

My Role: AutoCAD • Project Management
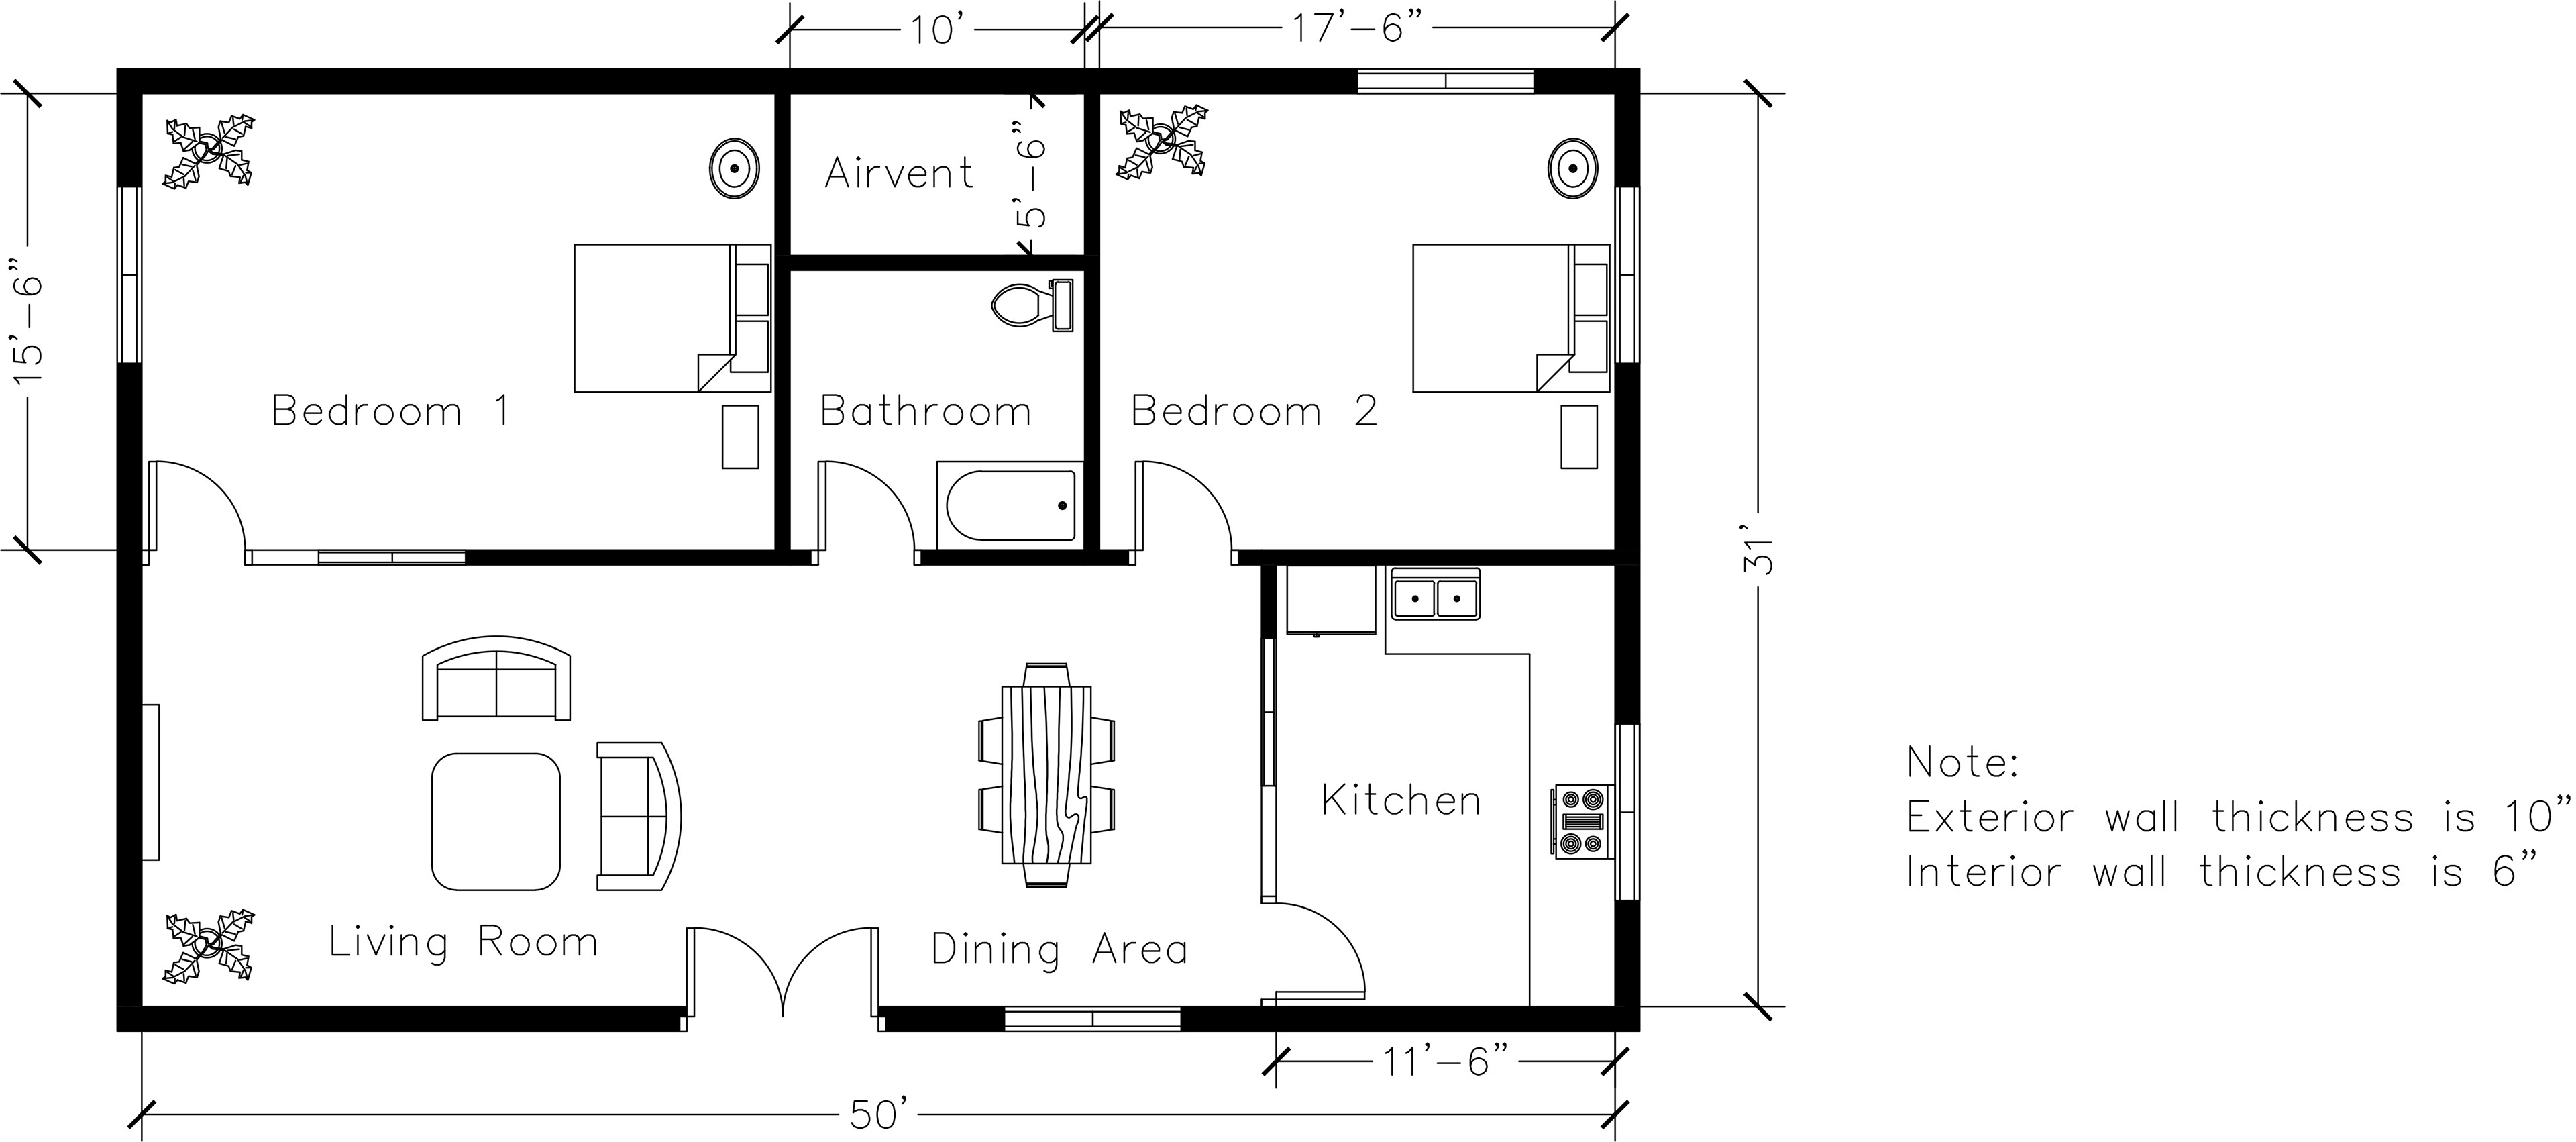
The Floor Plan
After much measuring, the floor plan was ready to be born!
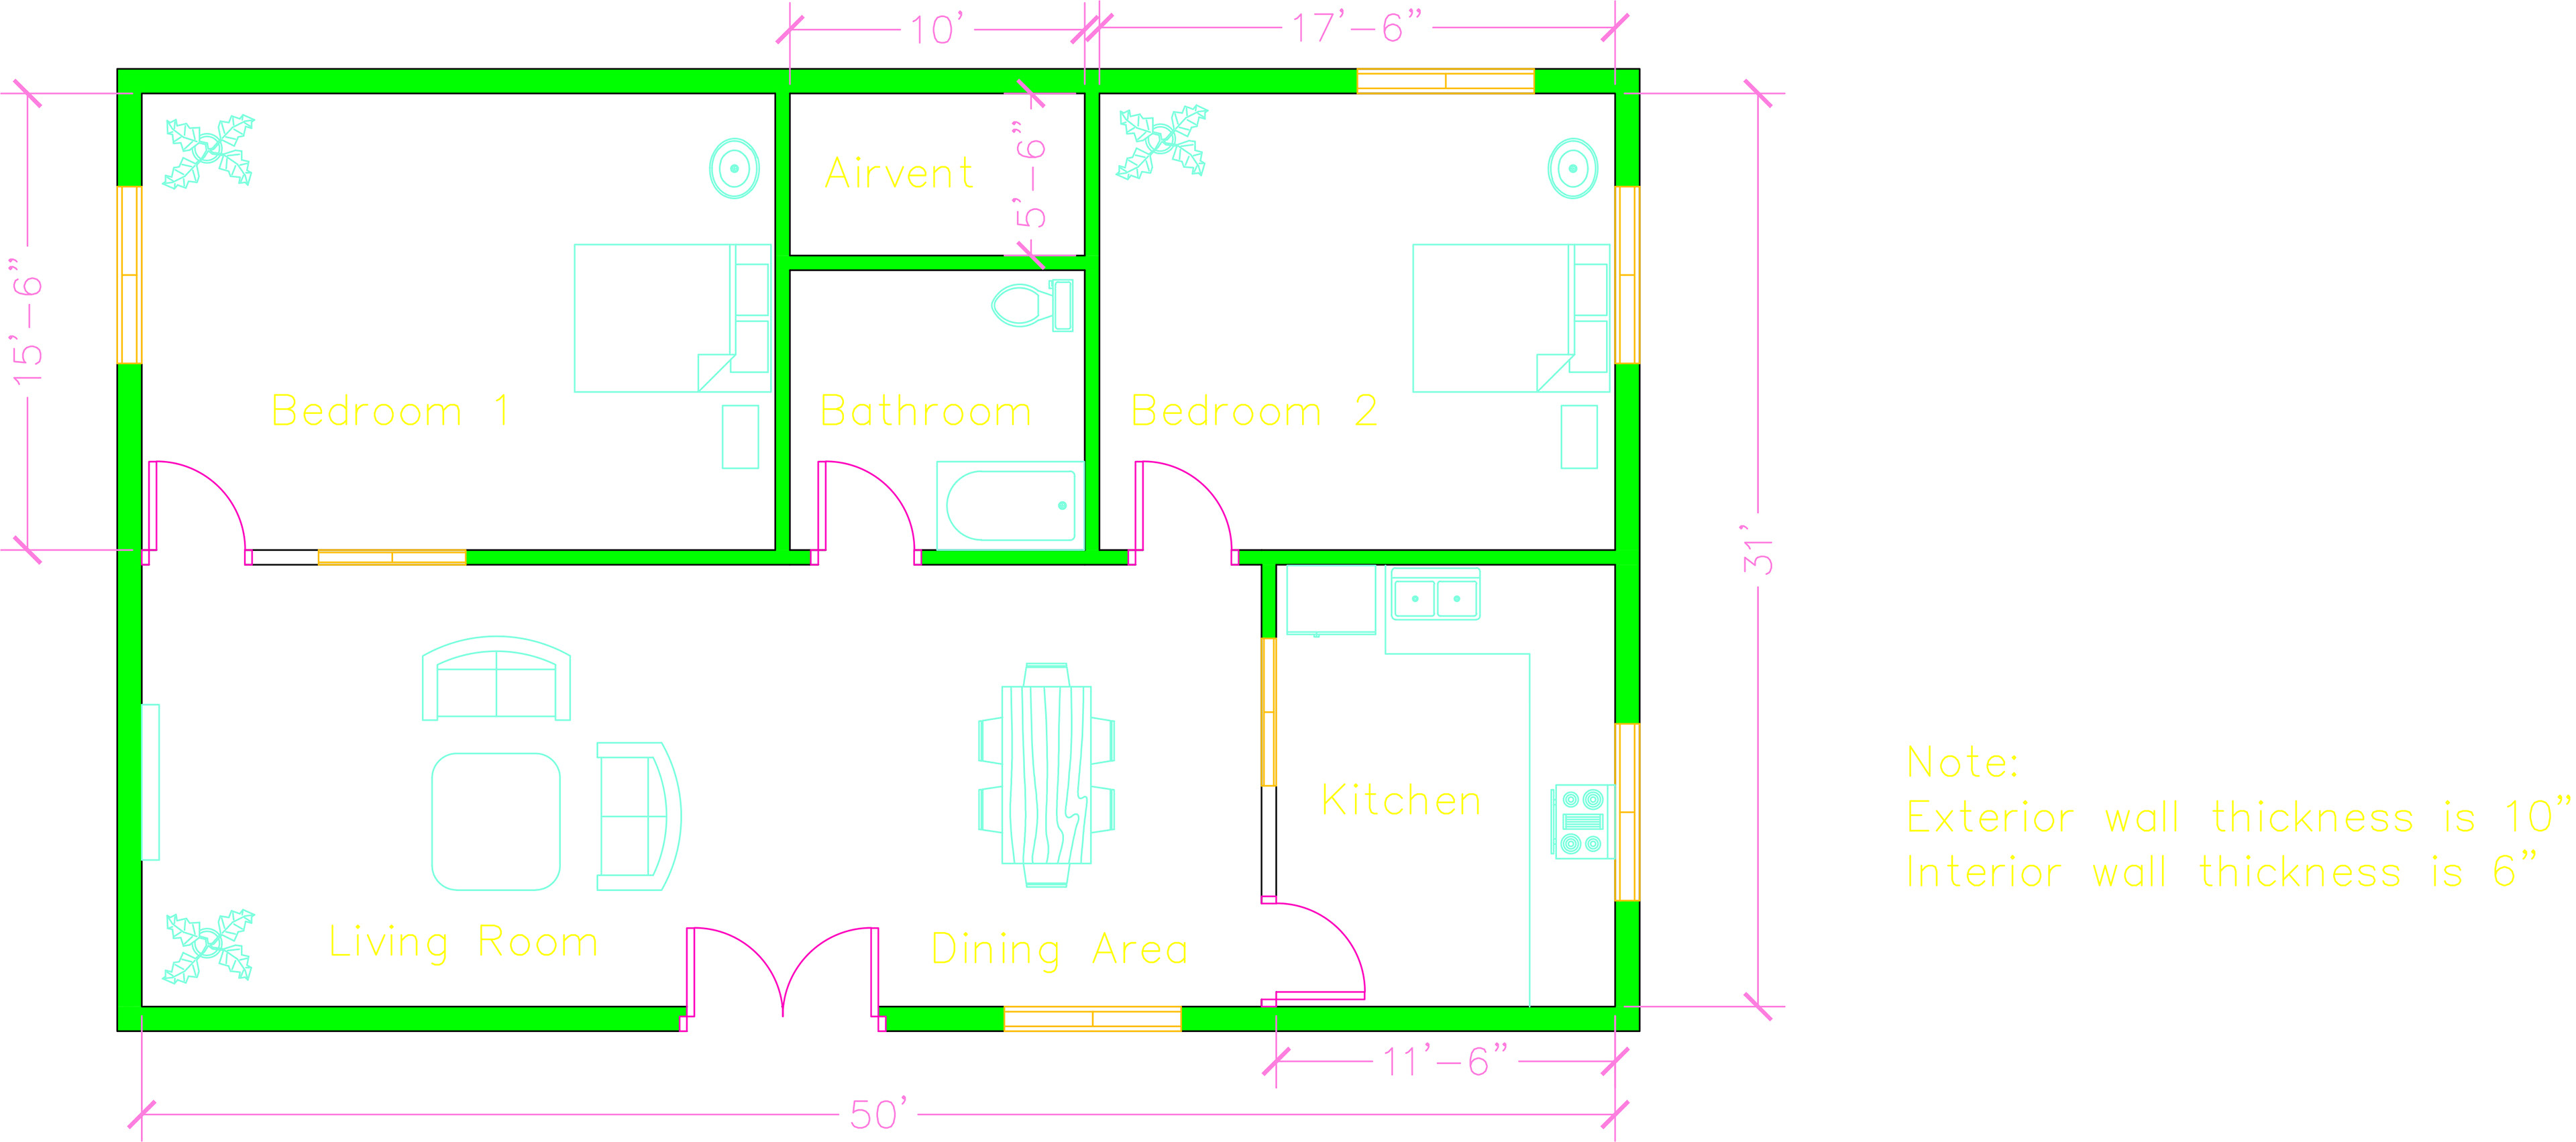
Accuracy was very important to the translation from graph paper to linework. The color categorizing of items such as the doorways, their orientation of opening, and blue furniture helps the viewer quickly distinguish between framework and aesthetics.
The Proposal:
• Create a Floor Plan that outlines the specific home measurements prior to construction
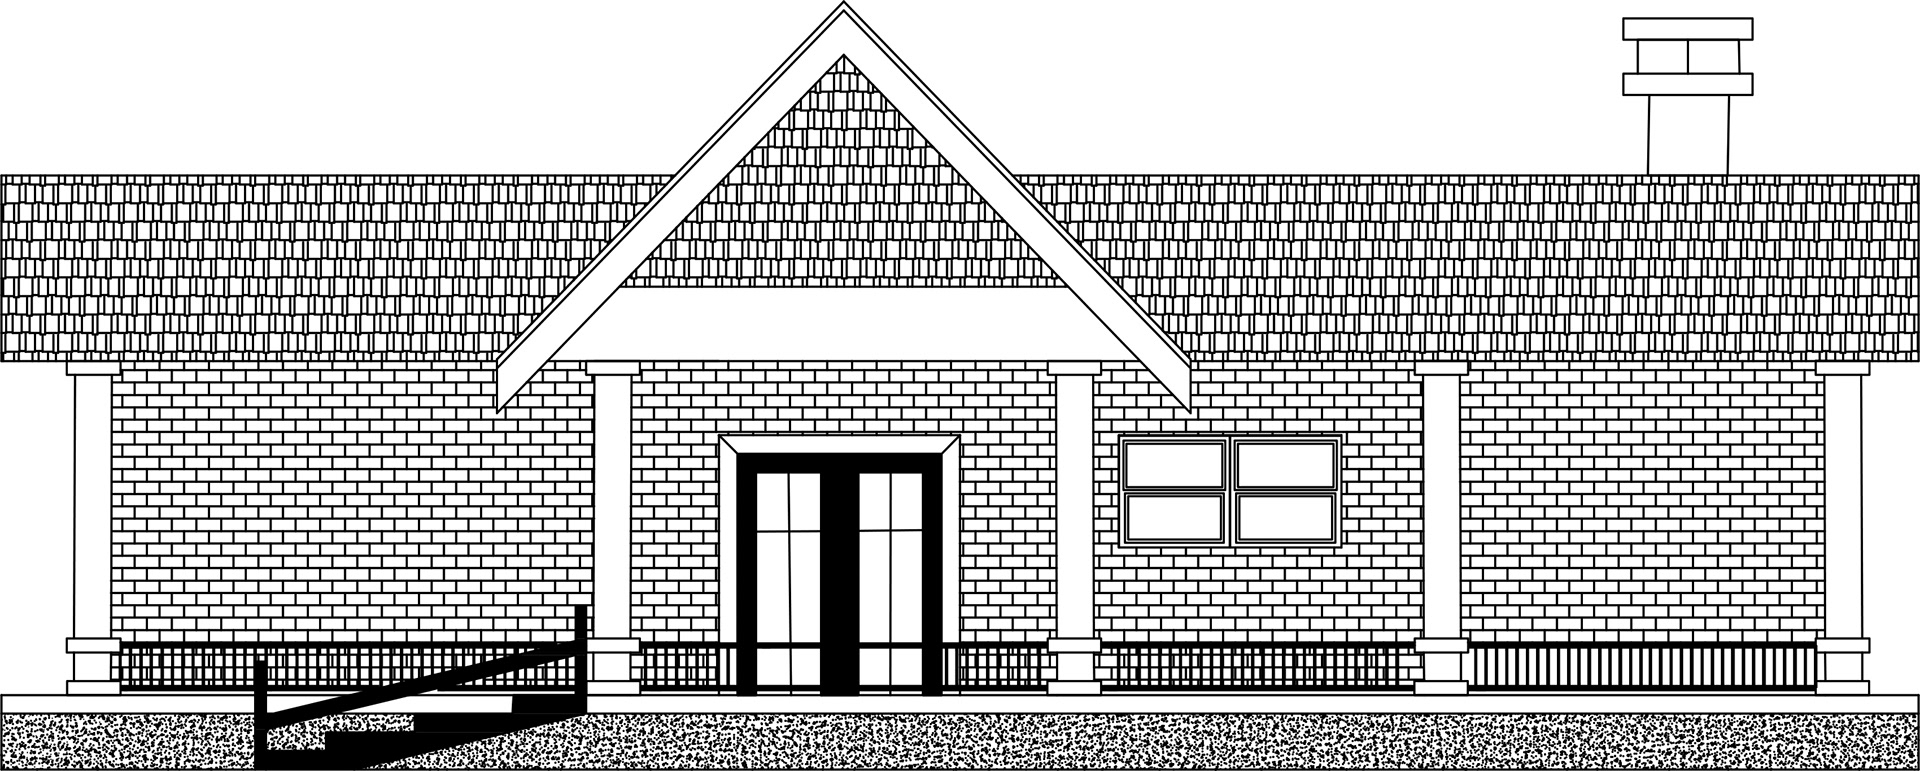
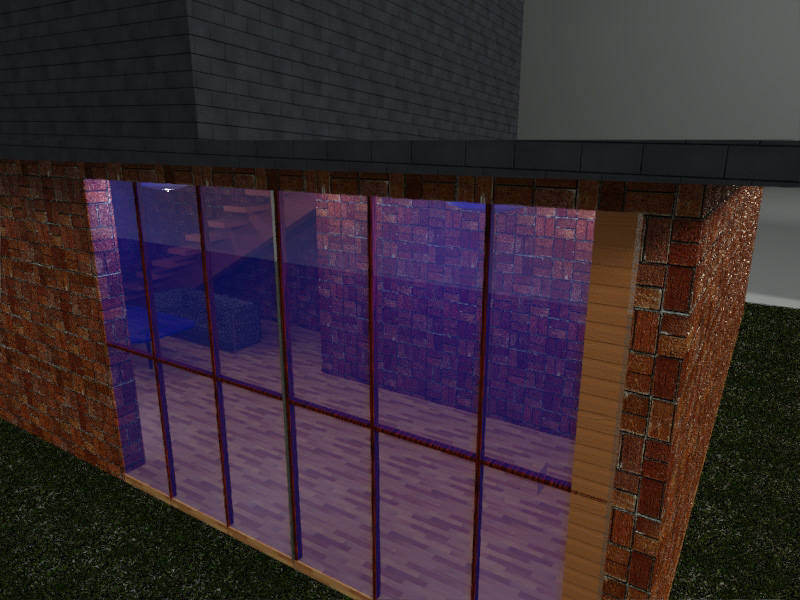
• Show the front outside view of the home that specifies the elevation
• Render a 3D view of the first floor model home
AutoCAD
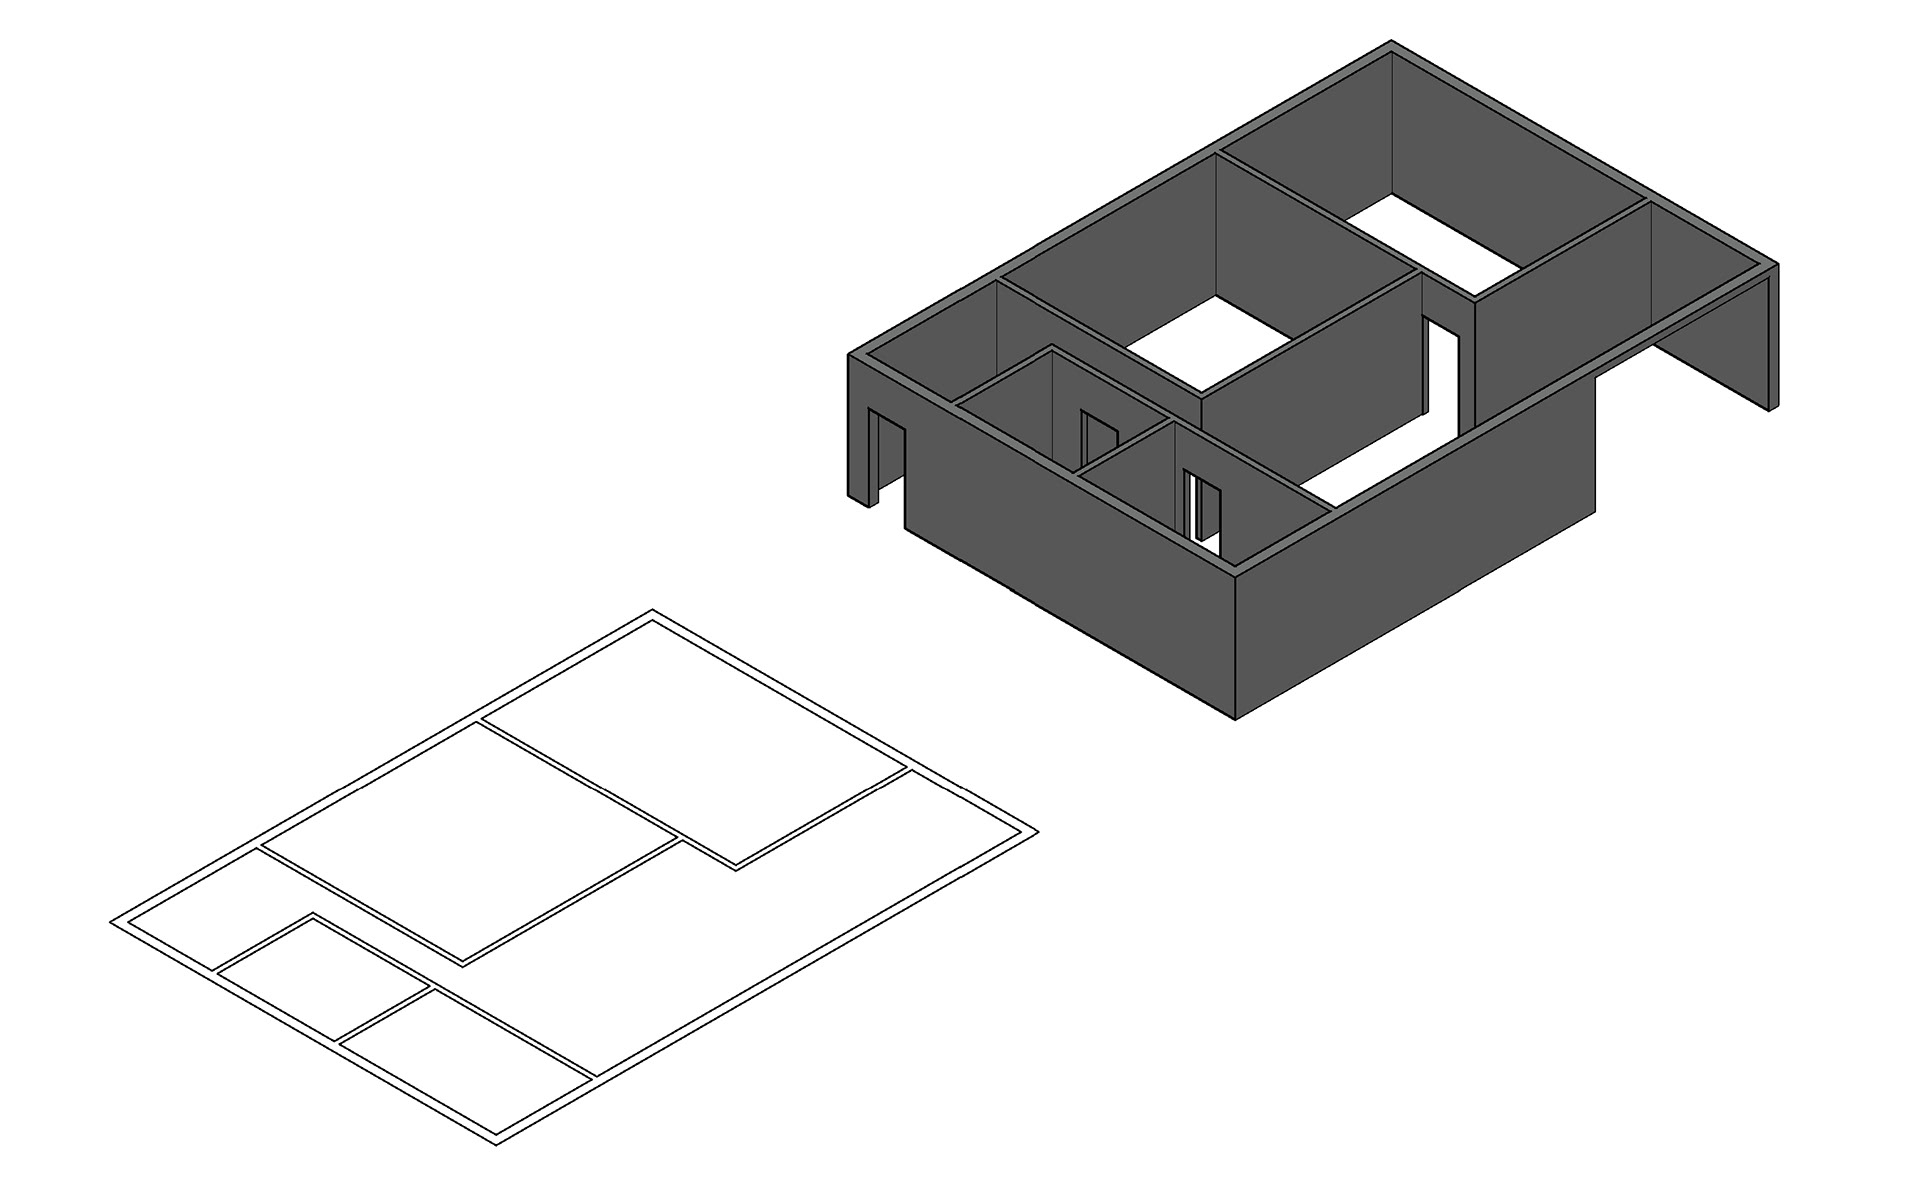
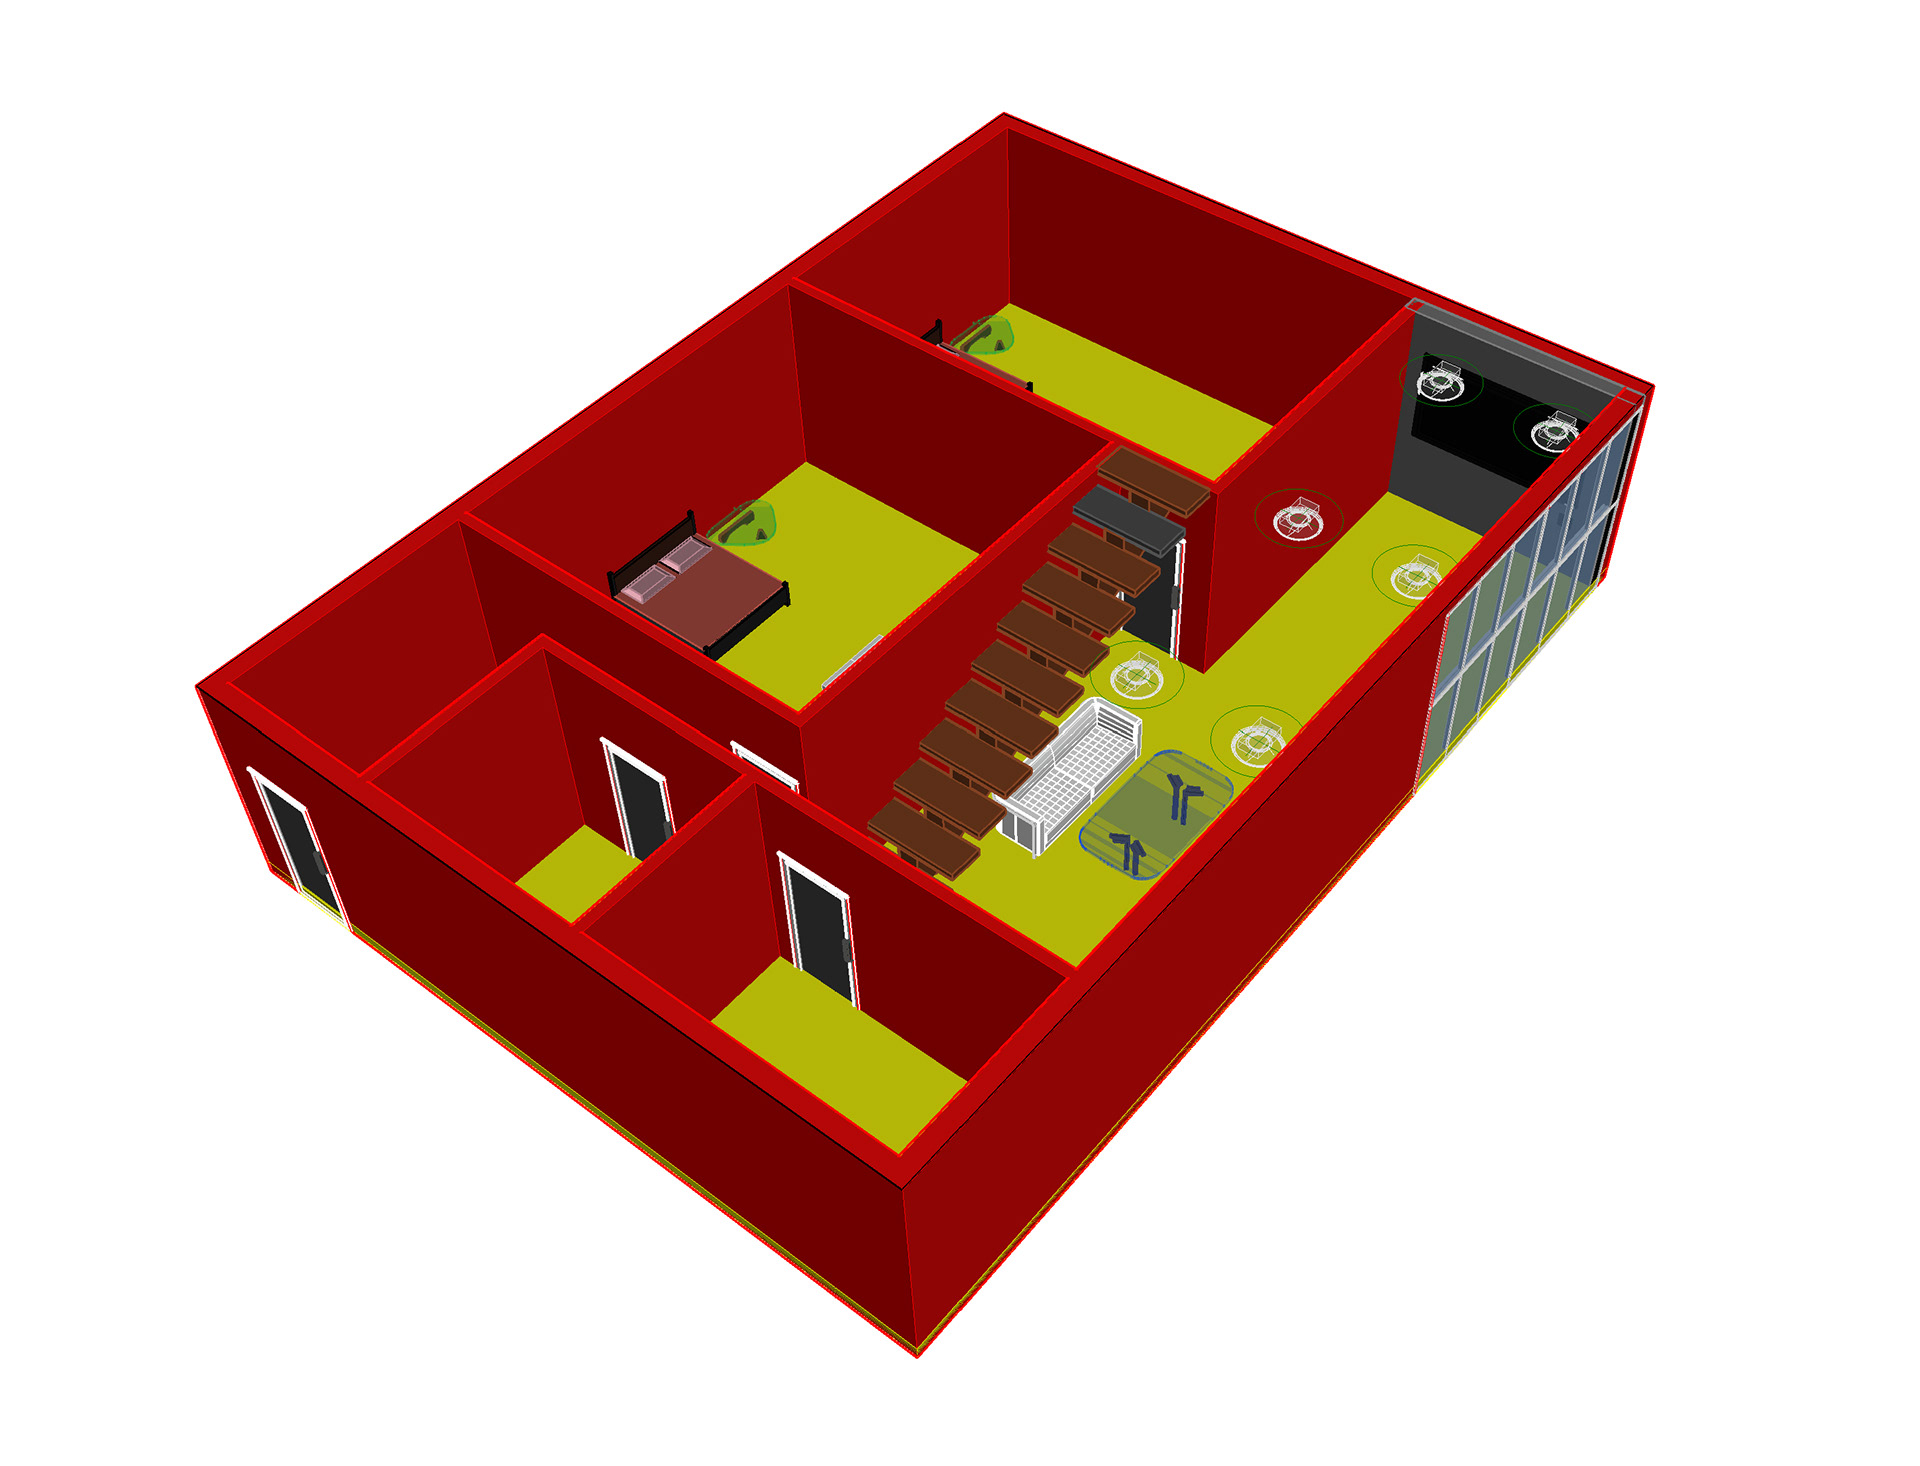
The transition from 2D to 2.5 Dimensional:
Working straight from the ground work of the first floor plan helped create new "height" to the above view perspective. Walls were built and set to reflect their appropriate measurement heights.
Working from step one and two only made step three even more accurate. The foundation and height of the front of the model was in place. Now, the only thing left was to start showcasing the front of the model as a more detailed layout. This included the concrete, stairs, and textures of the walls and shingles.
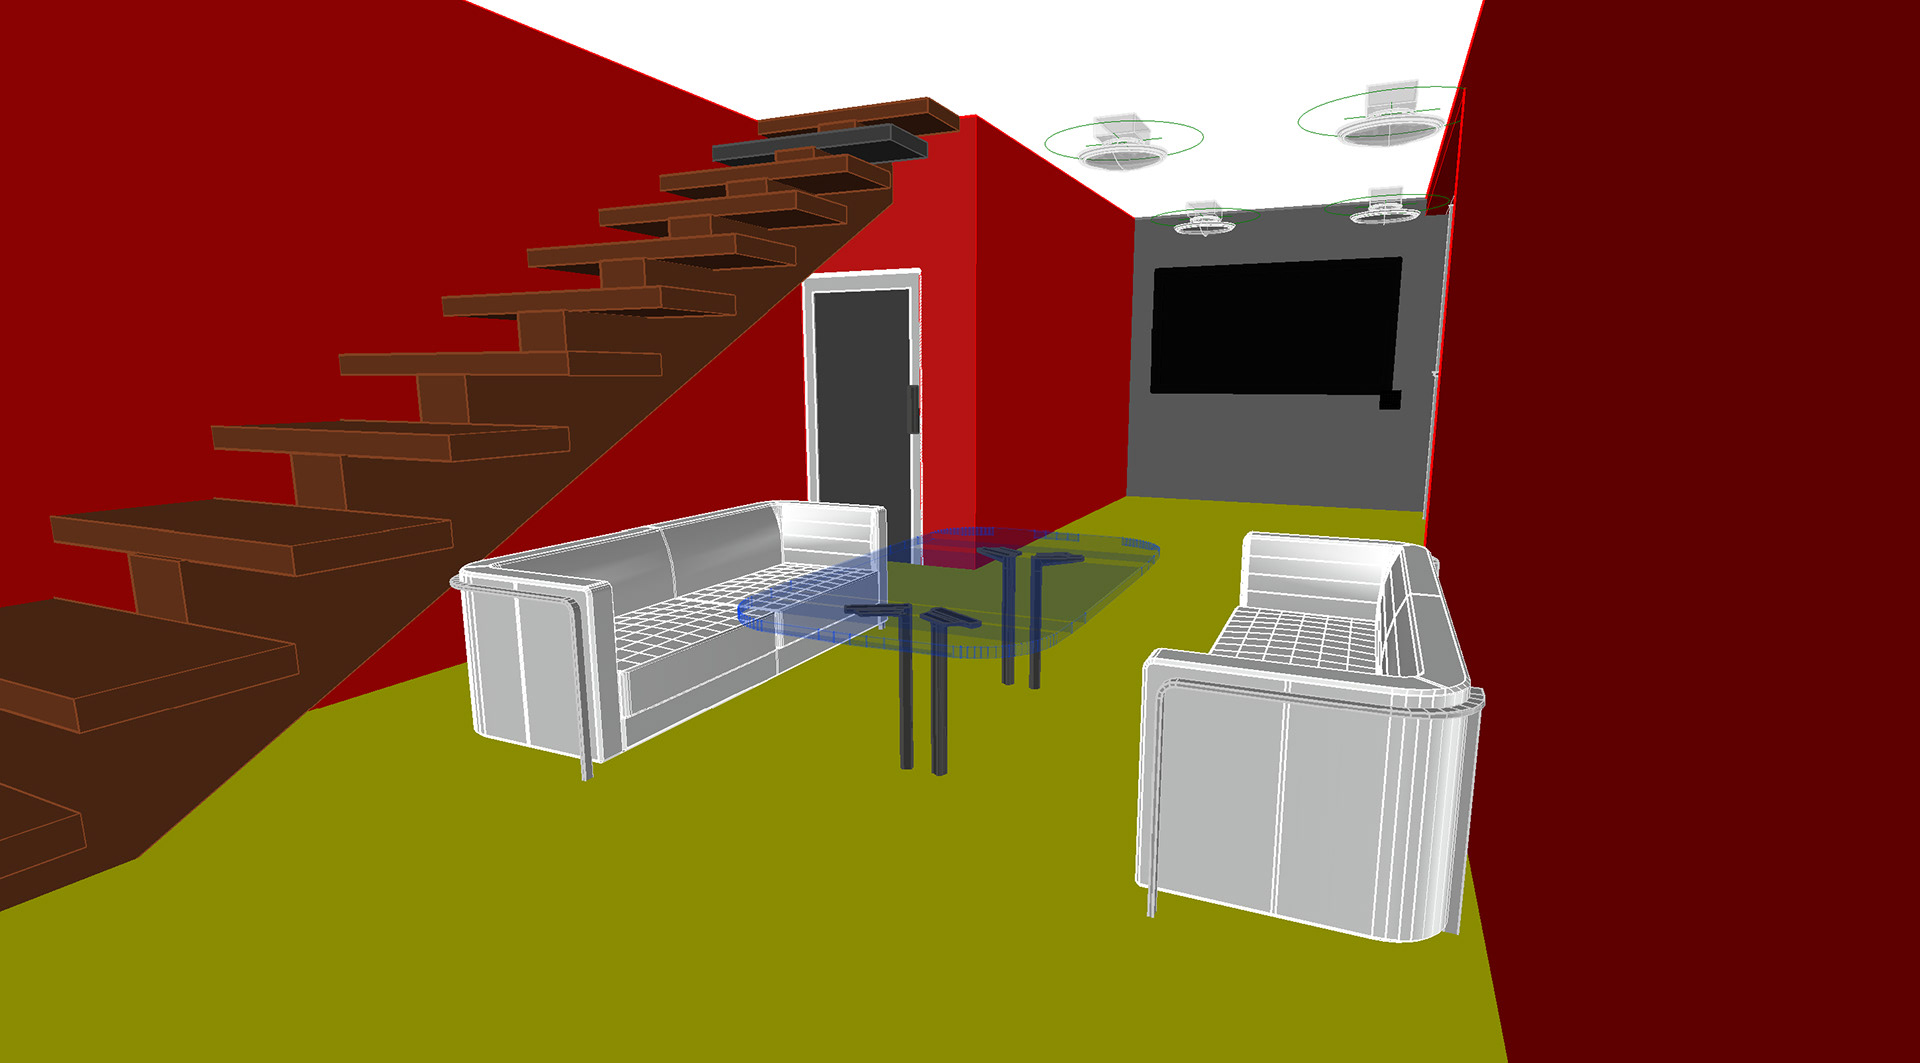
Now it was time to get into the nitty-gritty, the inside!
From 2.5D to 3D
Using a combination of assets, it was even more straightforward to build from the ground up, literally! All transitions of the model home came right from the original measurements. The variation in colors (red and yellow) helped correlate between the walls and flooring.
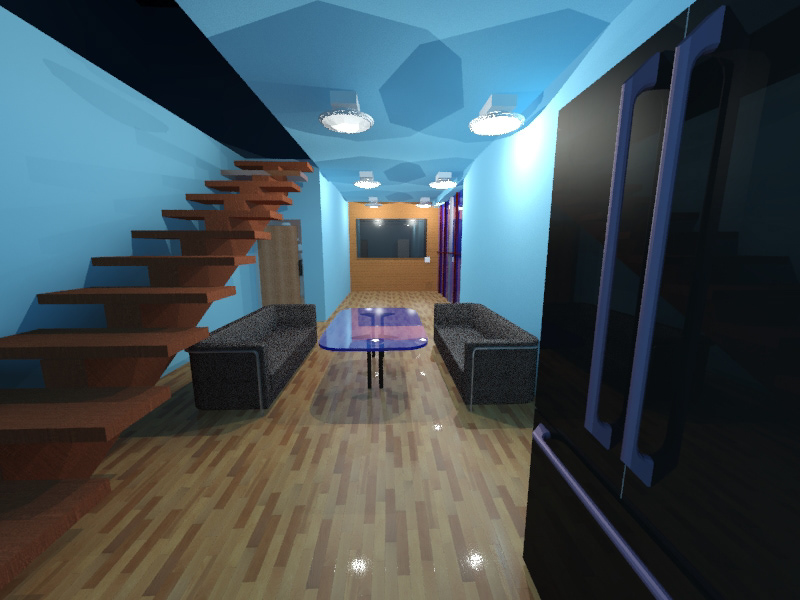
The Final Render
Once the 3D structure was built, texture was created, furniture was placed for decoration, and lighting was established. Then, it was time for a full blown render. The render previews the main living space utilizing furniture for sizing purposes.
The Outside to Inside Preview / Inside Render